

As an Amazon Associate and eBay Partner, toptenpick.com earns from qualifying purchases. Prices and availability are subject to change.
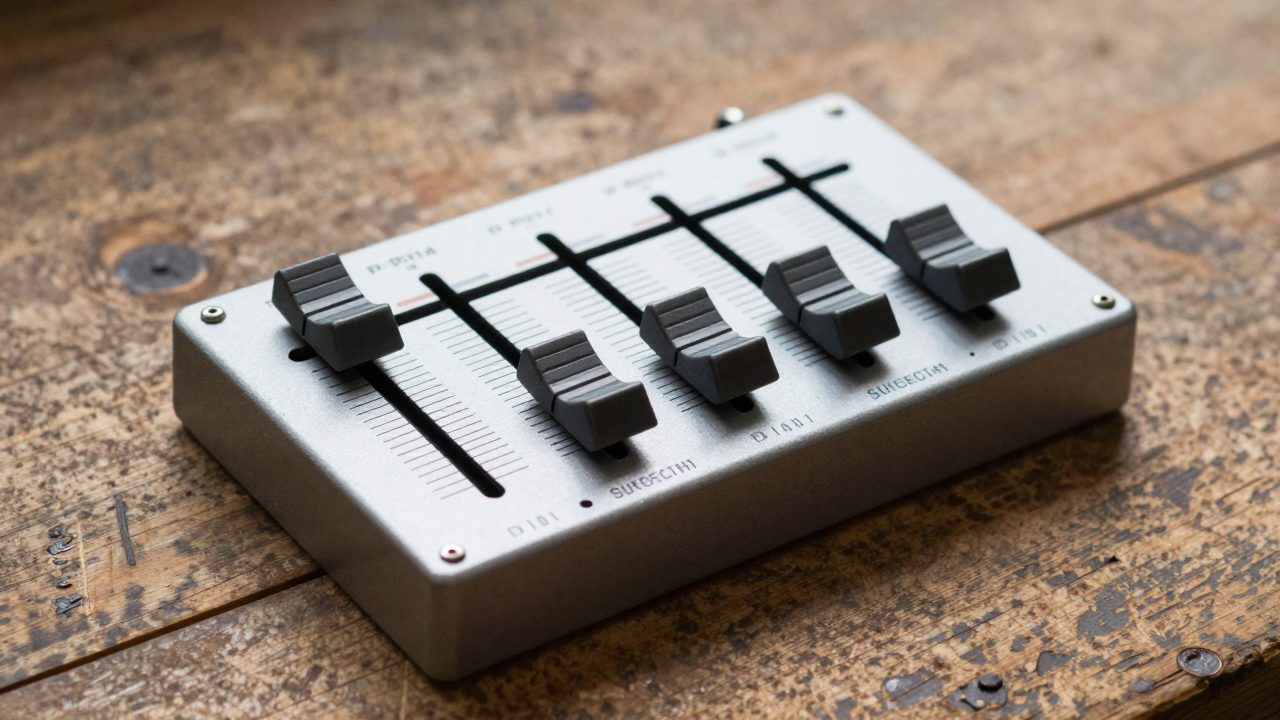
The Numark PT01 Scratch is a genuinely clever thing — a portable turntable with a scratch fader built into it — and the fader is the part everyone wants to replace. Understanding why comes down to one specification that is almost never printed on a product page.
Cut-in distance. That is how far the fader has to travel from the closed position before the audio actually appears. On a good fader it is a fraction of a millimetre, so the sound arrives essentially the instant you move it. On a cheap conductive-plastic fader it can be several millimetres, and — worse — it varies as the fader wears. Every technique that depends on the sound starting at a precise moment, which is most scratch technique, becomes unreliable. That inconsistency, not the feel, is the real reason the stock fader frustrates people.
The replacement market exists because of this. Contactless faders — optical or magnetic — have no wiper touching a resistive track at all, so there is nothing to wear, the cut-in stays exactly where it was set, and most designs let you adjust it. They also feel lighter and more consistent because the only resistance is the mechanism itself. This is the upgrade, and it is the one thing that changes what the instrument can do.
Two practicalities before you order. Space inside a PT01 is tight, and not every replacement fader drops in without modification — some need the housing trimmed, or the mounting holes adjusted, or a different cable routing. Check for a specific fitting guide for the PT01 rather than assuming a mini fader fits because it is small. And the job involves opening the unit and soldering, which voids any warranty and is beyond some people’s comfort. There is no shame in paying someone who does it regularly.
One alternative worth knowing: if you only want a better fader, a small external scratch mixer gives you one without opening anything.
Ten picks below.
| # | Product | Price | Where to buy |
|---|---|---|---|
| 1 | Mini Contactless Fader (Optical or Magnetic) | $90-$180 | Amazon |
| 2 | Replacement Conductive-Plastic Fader | $15-$40 | Amazon |
| 3 | Fader Cap (Crossfader Knob) | $5-$20 | Amazon · eBay |
| 4 | Soldering Iron with a Fine Tip | $25-$90 | Amazon |
| 5 | Desoldering Braid and Pump | $10-$25 | Amazon · eBay |
| 6 | Precision Screwdriver Set | $12-$35 | Amazon · eBay |
| 7 | Portable Scratch Mixer | $150-$400 | Amazon |
| 8 | Replacement Cartridge and Stylus | $25-$80 | Amazon |
| 9 | Slipmat for a 7-Inch Platter | $8-$25 | Amazon · eBay |
| 10 | Multimeter for Testing Before Reassembly | $20-$60 | Amazon |
The picks, in detail
Mini Contactless Fader (Optical or Magnetic)
The upgrade, and the reason this article exists. A contactless fader senses position optically or magnetically with nothing touching a resistive track, so there is no wiper to wear, the cut-in does not drift, and most designs let you adjust the cut-in and the curve. The feel is lighter and far more consistent than the stock fader. Check specifically that the model is documented as fitting a PT01 — the internal space is tight and not every mini fader drops in unmodified.
- Optical or magnetic position sensing
- No wiper contact, so no wear
- Adjustable cut-in and curve on most
- Mini format for portable units
- Cut-in stays exactly where you set it
- Nothing wears, so the feel does not degrade
- Adjustable cut-in and curve
- Fitment in a PT01 is tight — check for a specific guide
- Considerably more expensive than the fader it replaces
Replacement Conductive-Plastic Fader
The cheap fix, and worth knowing about because a worn fader and a bad fader are different problems. If the stock fader has developed crackle, dead spots or a cut-in that has drifted badly, a straight replacement of the same type restores it to how it was new — which for some people is enough. It costs a fraction of a contactless unit and it is a simpler fit. What it does not do is improve on the original, because it is the original.
- Same conductive-plastic construction
- Direct replacement dimensions
- Restores original performance
- Much cheaper than contactless
- Cheap way to fix a worn fader
- Direct fit with no modification
- Simpler soldering job
- No better than the original once fitted
- Will wear the same way again

Fader Cap (Crossfader Knob)
The cheapest thing you can change and more significant than it sounds, because the cap is the only part of the fader your hand ever touches. Height, width and surface texture all change how the movement feels and how precisely you can control it — a taller cap gives more leverage and a wider one more contact. Several caps cost very little and swapping them takes seconds. Trying two or three is worth doing before concluding you need a new fader mechanism.
- Various heights, widths and textures
- Push-fit onto the fader shaft
- Sold individually and in sets
- Several colours
- Changes the feel for very little money
- Swaps in seconds with no tools
- Worth trying before replacing the fader
- Shaft sizes vary — check it fits
- Cannot fix a worn or inconsistent mechanism
Soldering Iron with a Fine Tip
The tool the job actually needs, and a temperature-controlled iron with a fine conical or chisel tip is the right one. A large uncontrolled iron lifts pads off a small circuit board, and a lifted pad on a fader connection is a considerably worse problem than the fader you were replacing. Temperature control matters because you want to heat the joint quickly and get off it. If you have never soldered, practise on something disposable before opening the turntable.
- Temperature-controlled, 200-450 °C
- Fine conical or chisel tips
- Stand and cleaning sponge
- Replaceable tips
- Fine tips avoid lifting pads on small boards
- Temperature control means quick, clean joints
- Useful for every future repair
- Requires practice before working on something you care about
- Cheap uncontrolled irons damage small boards
Desoldering Braid and Pump
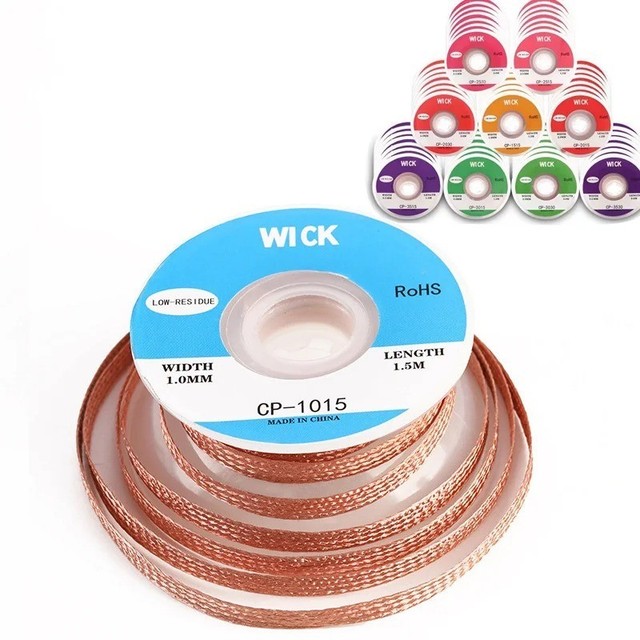
How the old fader comes out without damage. Braid wicks molten solder off a joint by capillary action and a pump sucks it away, and between them they clear a pad properly so the new part seats flat. Trying to lever a component out while heating one joint at a time is how pads get torn off the board — which on a small board is often not repairable without wire jumpers. Both are cheap and both are genuinely necessary for this job.
- Copper desoldering braid in several widths
- Spring-loaded solder pump
- Flux-impregnated braid
- Cheap consumables
- Clears pads properly so the new part seats flat
- Prevents the torn pads that levering causes
- Cheap and long lasting
- Braid needs enough heat to work — it is not a cold tool
- Pumps need cleaning or they stop sealing

Precision Screwdriver Set
For getting into the unit without marking it. The PT01’s case uses small cross-head screws, and a driver that is even slightly the wrong size will cam out and round the head — after which that screw is coming out with pliers and a lot of swearing, if at all. A precision set with correctly sized tips and a magnetic handle also stops the screws disappearing into a carpet, which is the other reliable way this job goes wrong.
- Precision cross-head and torx bits
- Magnetic handle
- Parts tray in better sets
- Compact case
- Correct fit prevents rounded screw heads
- Magnetic tips stop screws being lost
- Useful for every other small repair
- Cheap bits round off before the screws do
- Easy to reassemble with screws in the wrong holes
Portable Scratch Mixer
The alternative that requires no soldering and no opening anything. A small two-channel scratch mixer with a good fader takes the PT01’s output and gives you a proper crossfader, usually with adjustable cut-in and curve — plus the ability to bring in a second source. It costs more than a fader and it gives you a piece of equipment that works with everything else you own, rather than a modification to one turntable. For anyone uncomfortable with a soldering iron, this is the route.
- Two channels with a proper crossfader
- Adjustable cut-in and curve on better units
- Portable and often battery powered
- Works with any source
- No soldering, no warranty voided, no risk
- Works with other equipment too
- Adds a second channel
- More expensive than a fader replacement
- Another box and more cables to carry
Replacement Cartridge and Stylus
Worth doing alongside, because the fader is only half of what makes a portable turntable frustrating. The stylus on a portable is doing the hardest job in vinyl — being dragged backwards repeatedly under high tracking force — and a worn one skips, which people blame on setup. A fresh cartridge with a conical tip suited to scratching tracks far more securely than a worn one. Keep a spare stylus; on a portable it is a consumable rather than a permanent part.
- Conical stylus profile for scratch use
- Higher tracking force tolerance
- Replaceable stylus assembly
- Fits portable turntable headshells
- A worn stylus is the usual cause of skipping
- Conical tips survive back-cueing
- Cheaper than most people assume
- A consumable, not a one-off purchase
- Needs correct fitment for the headshell

Slipmat for a 7-Inch Platter
Cheap, and it does more for how the turntable feels than most people expect. A slipmat lets the record move independently of the rotating platter, which is what makes the record stop and start under your hand instead of fighting the motor. Portable turntables use a small platter and need a mat sized for it — a full-size 12-inch mat cut down works and a proper 7-inch mat works better. Some players prefer a slicker mat for faster movement.
- Sized for a 7-inch platter
- Felt or synthetic slip surfaces
- Different friction levels available
- Very cheap
- Lets the record move independently of the platter
- Transforms control under the hand
- A few dollars
- Full-size mats need cutting down
- Friction preference is personal and takes experimenting
Multimeter for Testing Before Reassembly
The step that prevents putting a case back together twice. A multimeter on continuity lets you check your solder joints before anything is screwed down — a joint that looks fine and is not connected is a common outcome for anyone who does not solder daily. Testing takes a minute and reassembling a PT01 takes rather longer. It also lets you verify the old fader really was the fault before you buy a new one, by checking its resistance sweeps smoothly across its travel.
- Continuity and resistance measurement
- Fine probe tips for small pads
- Audible continuity beep
- Compact
- Catches bad joints before reassembly
- Confirms the old fader is actually the fault
- Cheap and useful for everything else
- Fine probes are needed for small pads
- Very cheap meters read inconsistently
Buying tips
- Cut-in distance is the specification that matters. It is how far the fader travels before audio appears, and on a cheap conductive-plastic fader it is both long and inconsistent as the wiper wears. That inconsistency, not the feel, is what makes precise scratch technique unreliable. A contactless fader holds it exactly where you set it.
- Check for a PT01-specific fitting guide before ordering. Internal space is tight and not every mini fader drops in unmodified — some need the housing trimmed or the mounting adjusted. A fader that fits a full-size mixer is not necessarily a fader that fits this. Look for someone documenting the exact model in this exact unit.
- Opening it voids any warranty. This is a soldering job inside a sealed consumer product, and if the unit is new and still covered, that cover ends the moment you take the case off. Decide whether the upgrade is worth that, or whether an external mixer — which requires no modification — is the better route for you.
- Try a different fader cap first. The cap is the only part your hand touches, and height, width and texture all change how precisely you can control the movement. Several caps cost a few dollars and swap in seconds. It will not fix a worn mechanism, and it is worth ruling out before spending on one.
- Check the stylus before blaming the fader. A worn stylus on a portable — dragged backwards repeatedly under high tracking force — skips, and skipping gets blamed on everything except the needle. Run a thumbnail over the tip and consider its hours. A fresh conical stylus fixes a lot of frustration that has nothing to do with the fader.
- Photograph everything as you take it apart. Cable routing inside a small unit is tight and specific, and a cable reassembled along the wrong path can be pinched by the case or foul the platter. A few photographs on the way in are worth far more than a good memory on the way out.
- Test your joints before you close it up. A solder joint that looks fine and is not connected is the standard outcome for anyone who solders occasionally, and finding that out after reassembly means doing the whole job again. A multimeter on continuity takes a minute and saves the second disassembly.
- Set the cut-in once you have fitted it, and then leave it alone. Adjustable cut-in is the main benefit of a contactless fader, and the temptation is to keep adjusting it. Set it as short as you can get it without the audio bleeding at the closed position, then practise on that setting for a few weeks. Consistency is the thing you bought.
As an Amazon Associate and eBay Partner, toptenpick.com earns from qualifying purchases. Prices and availability are subject to change.