

As an Amazon Associate and eBay Partner, toptenpick.com earns from qualifying purchases. Prices and availability are subject to change.
Almost every camera backpack is sold on litres and on a picture of a body with three small lenses beside it. Neither tells you the one thing you need to know for a Sigma 150-600, which is the internal length of the main compartment.
Here are the numbers. The Contemporary version measures 105 × 260 mm and weighs 1,930 g. The Sport is bigger again at 121 × 290 mm and 2,860 g. Those are the lens alone, retracted, without a hood. Add a camera body on the back — call it 90 mm of depth for a mirrorless body with a grip, more for a DSLR — and a little padding at each end, and a 150-600 Contemporary attached to a body needs roughly 380 to 400 mm of clear internal length. The Sport wants over 420 mm.
That is the specification to hunt for, and it is very often not published. A 25-litre bag might be 460 mm tall externally and offer only 330 mm of usable compartment once the laptop sleeve, the top lid and the base padding have taken their share. The bag will happily swallow a 70-200 and will not take your 150-600 with a body on it. Reversed hood adds another problem: on the Contemporary the hood reverses over the barrel and makes it fatter rather than longer, so check the width too — 105 mm becomes noticeably more with the hood on backwards.
The second thing the litre rating hides is load carriage. Two kilos of lens, plus a body, plus a second lens and a tripod, is genuinely heavy, and at that weight the harness stops being a comfort feature and becomes the point of the bag. A real hip belt that transfers weight to your pelvis matters more than the number of dividers. A photo bag with token webbing straps will be miserable after two miles.
The ten picks below cover the bag types that actually fit this lens, plus the accessories that make carrying it survivable. Measure your own rig first — body attached, hood as you carry it — and take that number shopping.
| # | Product | Price | Where to buy |
|---|---|---|---|
| 1 | Large Roll-Top Camera Backpack (30-35 L) | $130-$300 | Amazon · eBay |
| 2 | Long-Lens Photography Backpack (400 mm+ Compartment) | $250-$500 | Amazon |
| 3 | Hiking Backpack with a Camera Cube Insert | $120-$280 combined | Amazon |
| 4 | Side-Access Camera Backpack | $150-$320 | Amazon |
| 5 | Padded Lens Case or Pouch | $25-$70 | Amazon · eBay |
| 6 | Replacement Tripod Foot / Arca-Swiss Lens Plate | $40-$120 | Amazon · eBay |
| 7 | Heavy-Duty Camera Strap Attached to the Lens Collar | $30-$90 | Amazon |
| 8 | Rain Cover for Camera and Long Lens | $25-$70 | Amazon |
| 9 | Carbon Fibre Monopod with a Tilt Head | $80-$250 | Amazon · eBay |
| 10 | Silica Gel Packs and a Microfibre Cloth Set | $10-$30 | Amazon |
The picks, in detail

Large Roll-Top Camera Backpack (30-35 L)
The format most likely to fit, because a roll-top has no fixed lid stealing length from the main compartment — you simply roll it down less. That flexibility is exactly what a 400 mm rig needs. Look for models where the camera insert occupies the lower two-thirds and the roll-top section handles a jacket and lunch, which is a sensible division for a wildlife day. Confirm the internal compartment length rather than trusting the litre figure, and check that the laptop sleeve is not eating 30 mm of it.
- Roll-top closure with variable height
- Removable camera cube in the lower section
- 30-35 litre total capacity
- Side tripod attachment
- Adjustable height accommodates a long lens attached to a body
- Upper section carries non-photo kit for a full day
- Weather-resistant closure
- Access to the camera section is slower than a dedicated photo bag
- Internal length is rarely published — measure or ask
Long-Lens Photography Backpack (400 mm+ Compartment)
The purpose-built answer: a bag explicitly designed around a 500 mm or 600 mm prime, which means the main compartment is long enough for a 150-600 with a body attached and a hood reversed, with room to spare. These are the bags whose marketing shows a supertelephoto rather than three primes. They are expensive and they are big, but they solve the problem completely and they usually come with the load-carrying harness a two-kilo lens deserves. If wildlife is your main use, buy this and stop searching.
- Main compartment designed for 500-600 mm primes
- Length typically 430 mm or more internally
- Full harness with load-bearing hip belt
- Dedicated tripod and monopod carry
- Guaranteed fit with a body attached and hood reversed
- Harness genuinely designed for the weight
- Room for a second body and lenses alongside
- Large, heavy and expensive
- Overkill if the 150-600 is an occasional lens
Hiking Backpack with a Camera Cube Insert
The best-value route and the one experienced wildlife photographers converge on. A 40-litre hiking pack has the harness, the hip belt and the ventilation that photo brands charge a premium for and often do not match, and a padded camera cube dropped inside turns it into a camera bag. Buy the cube to fit the lens, not the bag — a cube around 400 mm long will hold the rig assembled — then buy any pack that swallows the cube. You also get the flexibility to remove the cube and use the pack normally.
- Standard 35-45 litre hiking pack
- Separate padded camera cube, sized to the lens
- Proper load-transferring hip belt
- Ventilated back panel
- Far better carrying comfort per dollar than photo-brand bags
- Cube can move between packs
- Pack is useful without the cube
- Slower access than a dedicated photo bag
- Two purchases to get right instead of one
Side-Access Camera Backpack
Side access matters more with a long lens than with any other kit, because the alternative is putting a heavy bag down in wet grass and opening the back panel every time a bird appears. A side-opening bag lets you swing one strap off, reach in and draw the rig out while the bag is still on your shoulder. For a 150-600 check that the side opening itself is long enough to extract the lens with the body attached — some bags have a compartment that fits and an opening that does not.
- Zip access from one or both sides
- Rear panel access for full unpacking
- Adjustable divider system
- Rain cover included on most
- Draw the camera without setting the bag down
- Much faster for opportunistic wildlife
- Rear panel keeps the back of the bag clean
- Side openings are often shorter than the compartment behind them
- Side zips are a weak point in heavy rain
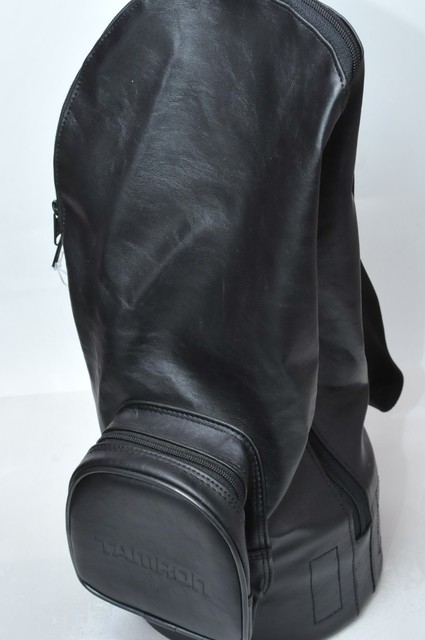
Padded Lens Case or Pouch
The pragmatic answer if you already own a backpack you like. A dedicated padded case for the 150-600, carried inside a normal pack or clipped to a belt, protects the lens without requiring you to rebuild your entire carry system. Choose by internal length: about 280 mm for the Contemporary alone, 310 mm for the Sport, more if you want the hood reversed. It also gives you somewhere safe to put the lens when you swap to a wide angle, which is otherwise an awkward moment in the field.
- Thick closed-cell padding
- Drawstring or zip closure
- Belt loop and shoulder strap
- Water-resistant outer
- Cheap way to protect the lens in a pack you already own
- Somewhere to put the lens during a swap
- Useful for transport in a car boot
- Does not hold the lens with a body attached
- Adds bulk inside an already full bag
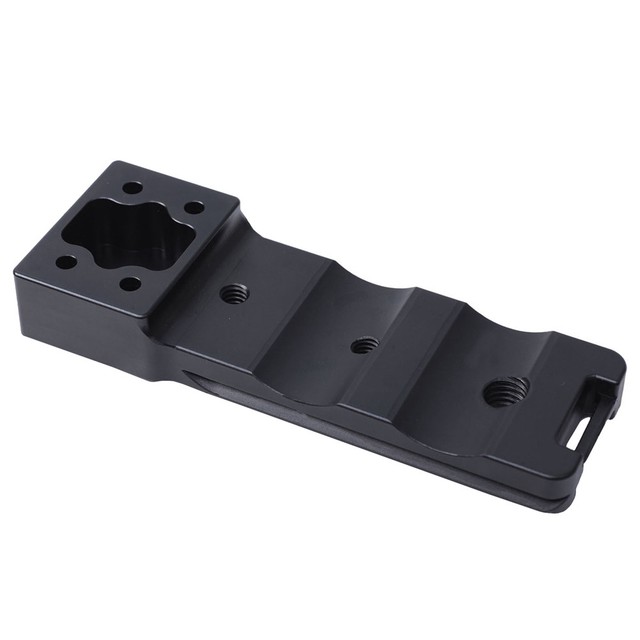
Replacement Tripod Foot / Arca-Swiss Lens Plate
A direct carrying upgrade rather than a bag. The Sigma’s factory foot is a plain block that needs a plate bolted to it; a replacement Arca-Swiss compatible foot removes that stack, saves weight, and gives you a proper handle for lifting the assembled rig. That last point matters for carrying: a long lens should always be picked up and supported by the lens, never by the camera body, because the mount is not designed to carry two kilos hanging off it. A good foot makes doing the right thing automatic.
- Arca-Swiss dovetail machined into the foot
- Direct replacement for the Sigma foot
- Aluminium or carbon construction
- Some include a strap attachment point
- Removes a plate from the stack, saving height and weight
- Gives a proper handle for lifting the rig
- Encourages supporting the lens rather than the body
- Must match the specific Sigma model and mount
- Cheap ones can have imprecise dovetail tolerances
Heavy-Duty Camera Strap Attached to the Lens Collar
The single most important accessory for carrying this lens, and the cheapest. A strap on the camera body hangs two kilos of glass off the lens mount, which is the wrong place to take that load. A strap attached to the tripod collar supports the rig from its balance point, keeps it hanging sensibly against your side and stops the body twisting. Choose a wide, padded strap or a sling with a fast-adjust — narrow webbing gets painful within an hour under this much weight.
- Attaches to the lens collar or the replacement foot
- Wide padded shoulder section
- Quick-adjust sling designs available
- Safety tether on better models
- Takes the load off the camera mount
- Rig hangs balanced instead of nose-down
- Much more comfortable than body-mounted webbing
- Needs a collar attachment point or a compatible foot
- Cheap quick-release hardware is a genuine risk at this weight
Rain Cover for Camera and Long Lens
Wildlife photography and rain are the same hobby, and a standard backpack rain cover protects the bag but not the rig when it is out. A sleeve-style cover long enough for a 600 mm zoom, with an eyepiece opening and armholes, lets you keep shooting in weather that would otherwise end the day. Check the quoted length against your lens plus hood — most covers are sized for a 70-200 and stop well short of 260 mm of barrel with a hood on the front.
- Sleeve design covering camera and lens
- Eyepiece opening and arm access
- Sized for 400-600 mm lenses
- Packs to pocket size
- Lets you keep shooting in weather
- Weighs almost nothing in the bag
- Far cheaper than a lens repair
- Most covers are too short for a 150-600 with a hood
- Fiddly to fit with cold hands
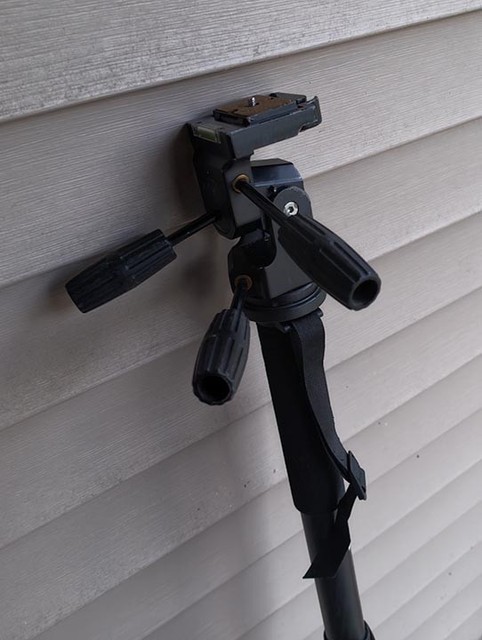
Carbon Fibre Monopod with a Tilt Head
The honest alternative to a heavier tripod, and it changes what bag you need because a monopod straps to the outside of almost anything. Two kilos handheld is fine for a while and tiring for a day, and a monopod takes the static weight while leaving you free to pan and follow. A tilt head — one that pivots forward and back but not sideways — is the right pairing for a long lens: full ball heads flop under this weight unless they are large and expensive.
- Carbon fibre, 4 or 5 sections
- Tilt head rated for 5 kg or more
- Arca-Swiss clamp
- Wrist strap and rubber or spiked foot
- Removes the static load without a tripod’s bulk
- Straps to the outside of any pack
- Much faster to deploy than a tripod
- No use for long exposures
- A cheap head will sag under 2 kg
Silica Gel Packs and a Microfibre Cloth Set
Temperature swings and long lenses are a bad combination — a cold lens brought into a warm car fogs internally, and internal condensation is far harder to deal with than a wet front element. A handful of rechargeable silica packs in the camera compartment absorbs the moisture that a damp bag brings home with it, and they can be dried in an oven and reused indefinitely. Add a couple of microfibre cloths and a blower. It costs very little and it is the maintenance most people skip.
- Rechargeable silica gel packs with colour indicators
- Oven or microwave regeneration
- Lint-free microfibre cloths
- Air blower for loose dust
- Prevents fungus and condensation in stored gear
- Reusable indefinitely
- Costs almost nothing relative to the lens
- Needs regenerating periodically to keep working
- Not a substitute for proper drying after a soaking
Buying tips
- Measure your actual rig before you shop. The Contemporary is 260 mm and the Sport 290 mm, lens only. Attached to a body with padding at each end, budget roughly 380-400 mm of clear internal length for the Contemporary and over 420 mm for the Sport. That number, not the litre rating, decides whether a bag works. Measure with a tape and take the figure with you.
- Check the width as well, because the hood reverses fat rather than long. The Contemporary’s barrel is 105 mm across and the reversed hood adds meaningfully to that. A compartment that is long enough but narrow will not take the lens as you actually carry it. If a bag’s dividers are fixed rather than movable, this is where it will fail.
- The hip belt matters more than the dividers. A loaded long-lens bag runs 5 to 8 kg, and at that weight a proper belt transferring load to your pelvis is the difference between a pleasant walk and a sore day. Token webstraps with thin foam are not a hip belt. This is the single biggest advantage hiking packs hold over photo-brand bags.
- Never hang the rig from the camera body. Two kilos of lens pulling on a lens mount is a load the mount was never designed for, and the damage is cumulative rather than dramatic. Attach your strap to the tripod collar or a replacement foot so the assembly hangs from its balance point. Pick the rig up by the lens, always.
- Side access is worth paying for with this lens. The alternative is setting a heavy bag down in wet grass every time something appears. Verify that the side opening itself is long enough to withdraw the lens with the body attached — plenty of bags have a compartment that fits and an aperture that does not, and the spec sheet will not tell you.
- A camera cube in a hiking pack is the value play. Outdoor brands have spent decades on suspension design and sell it at volume; photo brands charge more for less. Buy a cube sized for the lens, then buy any pack that swallows it. You end up with better carriage, a pack that is useful without the cube, and usually money left over.
- Pack the lens along the back panel, not against the outer face. Heavy items carried close to your spine keep the load centred and stop the pack levering off your shoulders. A two-kilo lens sitting in the outermost compartment will pull you backwards all day. This is standard hiking practice and it applies exactly the same way to camera gear.
- Let cold gear warm up inside the bag. Taking a freezing lens straight into a warm car or house condenses moisture inside the barrel, where you cannot wipe it off and where it can eventually encourage fungus. Leave it sealed in the bag until it has come up to room temperature, and keep a few rechargeable silica packs in the camera compartment year-round.
As an Amazon Associate and eBay Partner, toptenpick.com earns from qualifying purchases. Prices and availability are subject to change.